Not yet done but, am in the process of mixing the circle with the black and basically making it to a shadow. i did retry multiple times trying tot get it right. Am using the black Painting brush on 2% darkness, just so its not so strong and messing up the sphere. What i have to do is paint the base of it and paint over the layer, and slowly blend them in. What i think i did wrong on the other ones was that i rushed to fast causing it to be all over the sphere.
Tuesday, December 18, 2012
Monday, December 10, 2012
Color Mix -1-2-3
What i learned here is was blending the any type of colors, mixing them together to get a mix, the told i basically used was the painting brush. setting the paint brush big. Also what i did was put the flow on at least 2% so it don't make it rich dark than it usually was. The point was to mix both colors but see the original color.
Tuesday, December 4, 2012
Friday, November 30, 2012
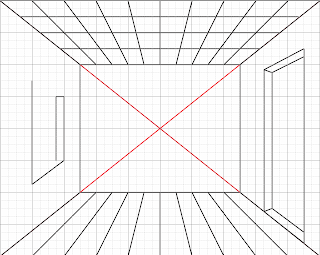
Am done with the door, i will be doing the window next because i did not finish. i Messed up on door so i will have to do all over again. The top and the bottom are done, I used line tool to estimate the line of the door to make it straight and not cricket. I put the 2 lines going to the square to measure it.
Wednesday, November 28, 2012
Monday, November 26, 2012
Monday, November 19, 2012
Tuesday, November 13, 2012
What i learned in this project was to do an animation on something random, So i deiced to do a running man that will run into the end of the sides, First what i did was get an image off Google and just like corp each one, so they all don't have to be together. next what i did was put on multiple of each one. so they all have a second layer. Went to windows tab and than clicked on "animation" i started to paste each one on them by going on duplicate, after all, that what i ended up with,
Wednesday, November 7, 2012
Monday, November 5, 2012
Thursday, October 25, 2012
Tuesday, October 23, 2012
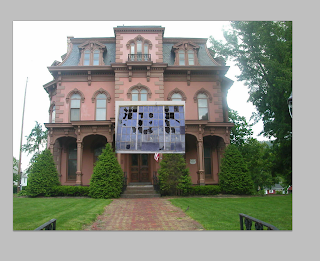
i had found a window to finally use for the project, i decied to leave the trees there and start over again. Once i change the theme of the background, it will be dark, as haunted house. So i will be tenting the trees in the house dark, and make them shrink, i still have to cut off the sides and just have the house its self. i will add broken window to all the parts of the house, to make it look legit and haunted,
Friday, October 19, 2012
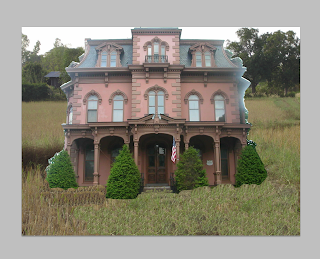
i am in the process of using the healing brush to take out the tress in the house. they came out cricket but i will be fixing it next class. my mission is to take out all the tress and just have the house by its self, i will be using healing brush on replace mode to fix all the errors and just make it to a house only,
Wednesday, October 17, 2012
Thursday, October 11, 2012
Final Spider-Doo
i mess up on the cheeck of the spider doo, didnt know how to fix it, What i did, was basically just cut off the head of the spider man, and put a head of scooby doo, Thats why they name it spider doo, The next step was that i changed the color of the scoobys head to the color it cornates with spiders man body, Red. the next hard step was adding the web to the face, i used the transform tool to caculate the sides and all. i erased the web where it goes to the eyes and nose,
Tuesday, October 9, 2012
Almost Finished
i was gone for a day of class, so i could of finished that day. but today, am started to to put the wen around the scooby head.
Monday, October 1, 2012
Tuesday, September 25, 2012
Thursday, September 20, 2012
Final Zebraceros
Final with the Zebraceros and what i basically did was finish off the liquify tool. the parts i needed, After I started to shade it in with light 3% paint brush just shading almost all the image, it the contrast starting to show more, i got more in the belly part, What i also did in liquify i decided to use the rhinos feets and Zebras legs, because if I liquify the foot and all, it will look weird, I did a little liquify by the horns, just so it can look its actually coming out from its actual body,
Tuesday, September 18, 2012
Zebra/Rhino #2
In the process of using the healing brush. i still need to finish off the feet. After am done, i will have to blend in the black into the Photoshop, What i did was used liquify and i started to kinda stregh the photoshop, into the exact same spot as the rhino, just so i can see the zebra color not the rhino color.
I did much better using the liquify on this photo cause i started to be careful and watch out not to streth that much,
Friday, September 14, 2012
Zebra/Rhino
I had to resart my project again in doing the Zebra and cornating it with the Rhino. What i did wrong was used liquidfy and i accedtiy move blended the clors togthers and it started to look like a shadow, the most common tool i used was Go to edit and transform, and either use Scale or Wrap, to match the rhino, the other tool i used was magntic lasso tool to cut of the grass to show the rhino in the second layer, Last but not least, i will still have to liquidfy both of them togther,
Wednesday, September 12, 2012
Final Photoshop section assigment
What i did in this photoshop was to cut off the blue part, the background color, we used checker board instead, The tools i used was Lasso tool, Poygonal Lasso tool, Magntic Lasso tool. We also used a diffrent tab, Witch was Elillpitic Marquee tool. I had used that one more common, to cover the blue, and get the job done quicker, to take off the blue from the status, i used the Magnitc lasso tool bewcuase it will stick to the status and you just follow whereever you want to cut, The spikes on the top was a little hard because i didnt want to cut of the gold spikes all the way, off,
Thursday, September 6, 2012
Final Dog Healing Brush

As we contuine to use the healing brush, This one was a little easy, Just because I got the hang of using the healing brush tool. In the photo we had to cut of the trees. the wires in the sky and some people that were there, the whole point i think of this was to just fro people to concentrate on the dog and the dog only, What I used in this photo is the healing brush on replace mode, I used the ''alt'' key and copy that was on the back, I contuined to use it as it started to match it, And so in beyond i used on all of them.
Final Healing Brush Tool
There was a sorta a lot of things we used in this photo to make it exactly. Something that was really hard was taking out the car and repainting the side walk and the wasll again, I started using the the healing brush on Replace mode and draging what color i wanted, to match. After i had removed the poles and everything there was some places where the color was off and i used the normal brush and i started to match the color. like for an example, there was the side where the sky was straight up blue and using the healing brush on the normal mode, i kind of started to mix the color togther, Same thing with the road, blending the colors togther. to match it,
Final Using Liquify Tool
What i leraned that day when we started to use the liquify tool was a lot, How i could of strech out his eyes or anything in the face. What i did that was something diffrent was change his hair style, He started of with almost a fro, and what i did was use the Turbulence, and i just started to straight in his hair. Another thing that i learned was that we starting playing around with the twril tool. Witch i really did not use in my project, becuase it would of make my person funjny looking. The most i used on liqufiy tool was Pucker tool and Bloat.
Subscribe to:
Comments (Atom)


